Showing posts with label tutorial. Show all posts

Tuesday, January 11, 2011

DIY Subway Art

We ride the Metro into Washington DC every once in a while and have become quite familiar with their map, how to work the metro cards, and which way to exit the station. If you've ever ridden the DC Metro you know there's a little bit of sarcasm sprinkled onto that last sentence. Anyways, I was stalking browsing Etsy a while ago and came across this piece:
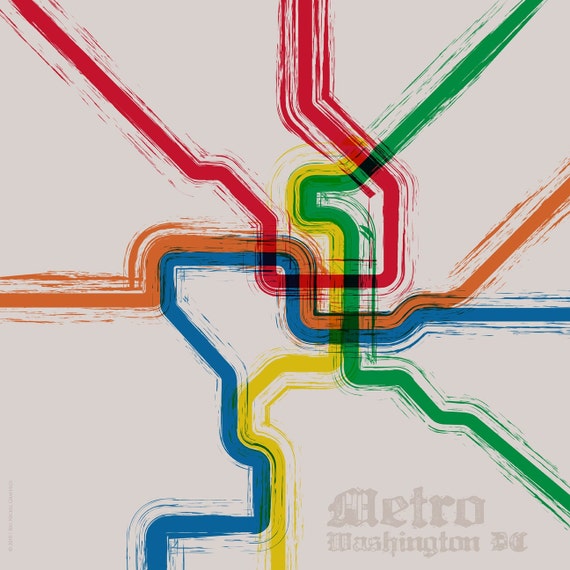
bigNickelgraphics Etsy Shop
It was love at first sight and then hate settled in when my eyes glanced at the price. A whopping $130 + shipping. Well, that is just absolutely unacceptable. I could have sprung for the $32 20x20 poster, but damnit I wanted the canvas.

Being so thrifty and cool (don't deny it), I made my very own for a sliver of the actual price! In fact I saved $114!


COST BREAKDOWN
24x24 canvas -$14
paint (I already had most of the colors on hand) - $2
Mod Podge - already had on hand
TOTAL COST = $16


FEATURED ON


PARTY HARDY

Quick tutorial and more pictures after the jump.

Saturday, December 18, 2010

Ball-o-Yarn Ornament

The multitude of posts that are clogging up filling my blog roll recently have inspired me to share my own DIY ornament.

This has definitely been done before (hence where my idea came from) so I claim no proprietary rights for this idea and promise not sue anyone for patent infringement if and when you copy me.


Gather your supplies:
Yarn (any color, I went for the color I wanted in the cheapest brand I could find)

Note: You don't have to use clear glass ornaments, you can really use just about anything. Racquetballs or ping pong balls would work wonderfully as well.

Step 1: Take off the thingy at the top of the ornament.
Step 2: Dab a little glue at the neck of the ball and hold yarn in place. At this point walk away for 5-10 minutes so that the glue can dry. If you don't walk away you'll be pulling off the yarn every 9 seconds to see if it's dry yet. Trust me. I pulled it off. Every 9 seconds. For like 6 minutes.
Step 4: Add a few lines of glue going down the ball. Not too long though, it tends to dry up fast.
Step 5: Wrap your yarn around the ornament.
Step 6: Keep wrapping.
Step 7: At some point when you hit the fattest part of the ball it starts to get harder to wrap the yarn around using the glue lines I mentioned above. So I tried the method in this picture out and that seemed to work better.
Step 8: Finish wrapping the whole ball. You can leave it how it is or you can go crazy wrapping the yarn in all sorts of directions. I chose to keep it sorta simple. It was late and I was tired, so I got lazy.

Please excuse the pictures. My camera all of the sudden takes crap pictures. Apparently my iPhone does a better job. Me not happy.

Monday, December 13, 2010

Pottery Barn Knockoff

Pottery Barn has some pretty smoking hot lamps. I especially love these:

Eva colored Glass Table Lamp

Atrium Glass Table Lamp

Problem is the Eva lamp goes for $99 and the Atrium lamp goes for $139. No way was I going to dish out that kind of dough for a lamp.

That is, until I saw a large bottle similar to the above at Ross for $15. Wham-o! The idea struck me, I can make my own PB knockoff lamp!!


COST BREAKDOWN
bottle vase = $15
 lamp kit = $10
lamp shade = $3
flange = $2
TOTAL COST = $30

PARTY HARDY


Tips on how to make this lamp can be found after the jump.

Thursday, August 12, 2010

Flowery Goodness

I couldn't sleep the night before last, so I made a pillow.


To create this pillow I followed this simple tutorial over at Design*Sponge which shows you how to sew a zipper onto a pillow. Once I had my pillow stuffed, I got to work on the felt flowers.


First, you want to cut circles out of your felt. One sheet of felt produced about 6 circles. I haphazardly cut out the circles, it doesn't matter if they aren't perfect.
Next, I folded each circle into fours creating a nice little scrunched petal and stitch the bottom to keep its shape.
Once you have all of your little scrunched petals you want to gather about 5-6 petals and stitched them all together to form a bunch. I then attached tiny safety pins to the back of the bunch.
Finally, just pin the flowers onto the pillow. Tah-Dah!

Cost Breakdown
1/2 yard of fabric = $7
16" zipper = $1.50
3 sheets of felt = $1
pillow form = $3
TOTAL COST = $12.50
 
The fabric is called Courtyard Pumpkin and was purchased at Jo-Ann Fabrics. Sorry, but I couldn't find it on their website.

Looking back at my receipt they charged me for a full yard of fabric instead of 1/2 yard. Clearly I need to pay more attention at the register because this isn't the first time they do this. Their entire fabric checkout system needs to be reworked. Bah!

FEATURED ON
 

LINKED TO